How to Remove Dip Nails at Home Without Ruining Your Nails
Dip nails have become increasingly popular in recent years due to their long-lasting, durable nature. However, as with any nail treatment, there may come a time when you want to remove them. While you can go to a salon to have them removed, it can be costly. Instead, you can remove dip nails at home without ruining your nails with a few simple steps.
What’s the difference between dip powder and gel?
Dip powder and gel are two popular nail enhancement options that can create a long-lasting, shiny finish. However, there are some key differences between the two:
Application process: Gel nails are applied in several coats, which are cured under a UV or LED light. On the other hand, dip powder is applied by brushing a bonding agent onto the nails, dipping them into a jar of colored powder, and then sealing with a topcoat.
Durability: Both gel and dip powder nails are known for their durability, but dip powder nails are typically considered to be even stronger and longer-lasting than gel nails.
Removal: Gel nails require soaking in acetone to remove, while dip powder can be removed by soaking in acetone or by filing off the top layer of the nail.
Thickness: Dip powder can create a thicker look on the nails, while gel nails can be built up in thinner layers for a more natural appearance.
Cost: The cost of both gel and dip powder nails can vary depending on where you go, but generally, dip powder is more expensive due to the additional materials and time required for application.
Benefits of dip nails
Dip nails are a type of manicure that involves applying a colored powder to the nails. Here are some potential benefits of dip nails:
Durability: Dip nails are known for their long-lasting wear. They can last up to four weeks without chipping or fading, which is longer than traditional nail polish.
Low maintenance: Once the dip powder is applied, there is no need for UV lights to cure the polish, so the application process is faster and less time-consuming.
Healthier for nails: Unlike gel or acrylic nails, dip nails do not require a primer, which means less exposure to harmful chemicals and less damage to the natural nails.
Versatile: Dip nails come in a wide variety of colors, brands and finishes, from matte to glitter, so there are endless options for customization like LDS, SNS, OPI dipping powder
Strength: Dip powder can help strengthen nails and prevent breakage. The powder contains vitamins and calcium that can help promote healthy nail growth.
It’s important to note that while dip nails have several benefits, they may not be suitable for everyone. Some people may experience allergic reactions or skin irritation from the chemicals used in the process, so it’s important to talk to a nail technician before getting a dip nail manicure.
How to Remove Dip Nails at Home
Dip nails have become increasingly popular in recent years due to their long-lasting, durable nature. However, as with any nail treatment, there may come a time when you want to remove them. While you can go to a salon to have them removed, it can be costly. Instead, you can remove dip nails at home without ruining your nails with a few simple steps.
Step 1: Gather Your Supplies
To remove your dip nails at home, you will need the following supplies:
- Acetone
- Nail file
- Aluminum foil
- Cotton balls or pads
- Cuticle oil
Step 2: File the Top Layer
The first step in removing your dip nails is to file off the top layer of the nail. Use a nail file to gently file the surface of each nail until the shiny top coat is removed. Be careful not to file too aggressively, as this can damage the natural nail.
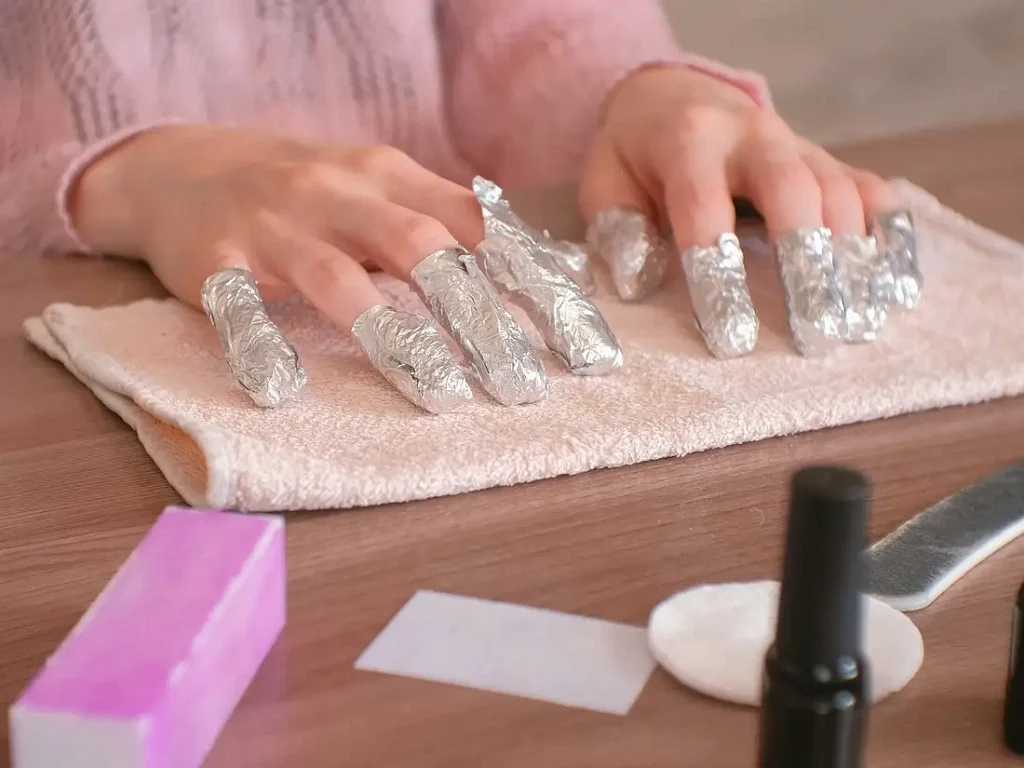
Step 3: Soak the Nails
Once you have removed the top layer, it’s time to soak your nails in acetone. Fill a small bowl with acetone and dip your fingers in it. Alternatively, you can soak cotton balls or pads in acetone and place them on top of each nail, securing them with aluminum foil. Allow your nails to soak for 10-15 minutes.
Step 4: Remove the Dip Powder
After soaking your nails, the dip powder should be soft and easy to remove. Use a cuticle pusher or orange stick to gently scrape off the dip powder. Be sure to start at the base of the nail and work your way to the tip to avoid damaging the natural nail.
Step 5: Moisturize Your Nails
Once you have removed all of the dip powder, it’s important to moisturize your nails. Apply cuticle oil to each nail and massage it in. This will help to hydrate and strengthen your natural nails, which may have become brittle from the dip powder.
Conclusion
Removing dip nails at home can be done with ease if you follow these simple steps. Remember to be gentle when filing and removing the dip powder, and always moisturize your nails afterward to keep them healthy and strong. By following these steps, you can save money and keep your nails looking beautiful and healthy.